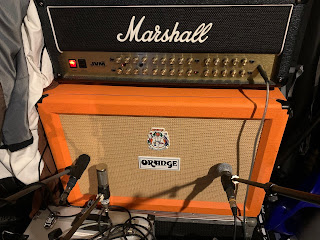
Following the instructions of the first part of the article, the setup should be ready: we should have a nice DI track, recorded at the right level, and all the routing in the DAW and in the sound interface software should be correctly set up: our guitar track is ready to be reamped!
4) Now we need to go from the audio interface output we have chosen for the DI track (in our example we have choosen the output n.3) into a REAMP BOX. What is a reamp box? It's a box that does exactly the opposite of a DI box: it takes a balanced signal (the one that comes out from the audio interface) and turns into an unbalanced one, meaning one at the right level to be fed into a guitar amp input (if you want you can also pass through pedals etc. before entering the amp, but remember that the signal comes out from the reamp box usually with more noise compared to if it would come straight from a guitar). Once the reamp box is plugged into the amp, we need to adjust the output level of the box in order to be the as loud as if it would be coming directly from a guitar.
5) Once the cables are plugged, it's time to press play on the DAW and let the song go: if we have done everything correctly, from the DAW monitors (or headphones) we should be able to hear the whole song, and from the amp we should be hearing only the correct guitar track.
This is the moment in which we find the right tone in the amp, so let's take our time in finding the right gain, eq, effects etc.
6) The last step is obviously the microphonation one: once we have a tone we like, we can start having fun, trying out all the microphones we have until we find the best combination and positioning among them (click here for some ideas), and the only remaining thing to do is to press record and enjoy our reamped track!
I hope this was helpful!
Become fan of this blog on Facebook! Share it and contact us to collaborate!!


Nessun commento:
Posta un commento