Visualizzazione post con etichetta GUITAR. Mostra tutti i post

sabato 20 novembre 2021

REAMPING: How to reamp a guitar track (part 2/2)

CLICK HERE FOR PART 1/2

Following the instructions of the first part of the article, the setup should be ready: we should have a nice DI track, recorded at the right level, and all the routing in the DAW and in the sound interface software should be correctly set up: our guitar track is ready to be reamped!


4) Now we need to go from the audio interface output we have chosen for the DI track (in our example we have choosen the output n.3) into a REAMP BOX. What is a reamp box? It's a box that does exactly the opposite of a DI box: it takes a balanced signal (the one that comes out from the audio interface) and turns into an unbalanced one, meaning one at the right level to be fed into a guitar amp input (if you want you can also pass through pedals etc. before entering the amp, but remember that the signal comes out from the reamp box usually with more noise compared to if it would come straight from a guitar). Once the reamp box is plugged into the amp, we need to adjust the output level of the box in order to be the as loud as if it would be coming directly from a guitar.

5) Once the cables are plugged, it's time to press play on the DAW and let the song go: if we have done everything correctly, from the DAW monitors (or headphones) we should be able to hear the whole song, and from the amp we should be hearing only the correct guitar track. 
This is the moment in which we find the right tone in the amp, so let's take our time in finding the right gain, eq, effects etc.


6) The last step is obviously the microphonation one: once we have a tone we like, we can start having fun, trying out all the microphones we have until we find the best combination and positioning among them (click here for some ideas), and the only remaining thing to do is to press record and enjoy our reamped track!

I hope this was helpful!


CLICK HERE FOR PART 1/2


Become fan of this blog on Facebook! Share it and contact us to collaborate!!

sabato 13 novembre 2021

REAMPING: How to reamp a guitar track (part 1/2)

Hello and welcome to this week's article!

Few years ago we have done an article about reamping (click here for the main article): now it's time to see in detail, step by step, how to reamp a guitar track.

The first thing to lear is how to route your channels to make sure that from the output channel of your audio interface only the guitar di signal comes out, while from your headphones or monitors you can keep listening to the whole project.

First off: you need to have in your project a DI guitar track, then, since usually all the tracks go to the stereo out, we need to steer this one away from there and make it go to a separate exit of our DAW and audio interface, an exit in which only our guitar track will be.

Today we're using the Presonus Studio One interface, but it should work more or less like this in every DAW: 

1) Go to song setup -> inputs and outputs and create a new mono output besides the standard stereo one (I've called it reamp, and the M there stands for Mono).


I have chosen "LINE 3", which means that when I assign the DI track to the output named "reamp" it will be listenable only by plugging the headphones to the output n.3 of my audio interface.

2) While all the tracks are assigned by default to the main out, meaning they will all end up into the stereo out buss (in the pic it's called "principale", because my interface is in Italian), I have changed the out for my DI track into "reamp", the new output we have created.


3) now we need to assign this "reamp" out to the physical out n.3 in my audio interface (you can assign it obviously to any out you want, just make sure the DAW and the output you're using in your interface are matching), and in order to do this we need to open the control panel of our audio interface, in my case it's the Saffire Mix Control from Focusrite.


In this case I assign "DAW 3" (which means the output to which we have routed our DI track in the DAW, which as you can see in the first picture is the out called "line 3") and we assign it in the "line output 3" slot (red arrow in the bottom of the pic), and we also assign it to a channel in the virtual mixer (red arrow in the top).

Now if everything went according to the plan, if we plug the headphones to the main headphone out of the audio interface we should be able to hear all the tracks going into the stereo buss EXCEPT the guitar DI one, while if we plug them into the out n.3 we should be able to hear only our DI track.

Once this complex preparation phase is done, it's TIME TO REAMP!


CLICK HERE FOR PART 2/2


Become fan of this blog on Facebook! Share it and contact us to collaborate!!
 

sabato 2 ottobre 2021

Using a wah in fixed position to boost a solo


Hello everyone and welcome to this week's article!

Today we're going to talk about a particular way to make a solo cut through, which is used by many musicians: to emphasize only a certain mid range area which is obtained by using a wah in fixed position.

Let's start by reminding what is a wah (click here for a dedicated article with free vst plugins): it's an envelope filter, which means basically an equalization filter that can be fixed or controllable in real time via a pedal control and that according to its settings will emphasize a certain area of the midrange of the guitar tone adding gain and harmonics.

A wah boosts and cuts a certain area of the midrange of a guitar to make it cut more through the mix, and when it's used with the foot control in a tasteful way it can really make the guitar almost talk, or cry like a baby (the famous Dunlop CryBaby is called like that for this reason).
This mid range boost, which is usually a rather narrow range between the 300 and the 3000hz makes the sound from dark to very bright and harmonic rich, but the most usual application when doing distorted solos is usually when it's kept around the central position, which means a boost around 1000-1500hz, which makes the tone very honky and recognizable.

This nasal tone is the core of the solos of many famous guitarists, which sometimes just set the wah in a certain way without even moving it, just to have that distincitve mid range, boxy boost when doing solos, and the tone obtained can be heard for example in many QueenIn Flames or Blind Guardian songs, bands very different among themselves which make extensive use of the wah both moving the filter in real time or leaving it in a fixed position according to the song, and this use of the wah also just in a fixed position as mid boost has led to the creation of several stompboxes which replicate just that: a wah with a fixed setting (for example the Dunlop CryBaby Q-Zone or the Magnetic Effects Midphoria).

When trying to recreate this type of effect in the studio when we don't have a wah at hand we can start with a not too steep high pass and low pass filter, between 300 and 3000hz, then we can draw a bell quite wide, around 1200hz and add some db in this area according to taste.
Obviously these settings are just a starting point, feel free to play with the filters amplitude and the position of the bell according to the tone you are looking for, and if you feel like you lose a bit too much sparkle try to be less aggressive with the high end roll-off or maybe to add a harmonic exciter.

I hope this was helpful!


Become fan of this blog on Facebook! Share it and contact us to collaborate!!
sabato 26 giugno 2021

Difference between old school and modern guitar distortion


Hello and welcome to this week's article!

Today we're going to clarify a bit what are the characteristics of the old school guitar distortion and the modern day hi-gain tone.

Let's start from the base: a distortion is an effect achieved by taking a signal and boosting it on purpose in order to make it become degraded, but in a controlled, euphonic way, with the aim of making it sound more aggressive and compressed, and this is exactly how it went initially; guitarists were plugging their guitars into tube amps and cranking them to the maximum (also because at the early stages there wasn't even what we might call today a p.a.), and the amps just couldn't handle it, so distortion was an unexpected (but usually welcomed) side effect.

Then Hendrix and rock n'roll in general exploded, guitarists were experimenting with their tone like crazy and pushing the boundaries with every record, and the amp producers simply adapted to the needs, creating amps (and pedals) capable of distorting on purpose without the need of putting everyting on 10.

Back in the day of the first hi-gain amps, distortion was permeating the whole frequency range, because it was generated both by the gain stages of the preamplifier and from the power amp, stressing its power tubes, and a good example of the early amps which featured a high-gain tone were the Marshall and the Orange amps of the '70s among the others.
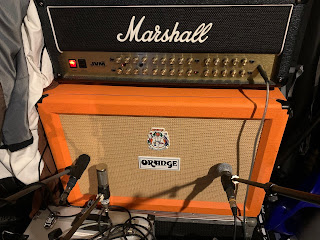
An Orange amp is a good example of old school distortion: it's prominent in the low-mids, which makes it a bit dark sounding, and it's very distorted in that same area, making the tone not very defined and not easy to control, but very punchy for example with groovy single string riffs, like many Led Zeppelin ones, in which every note hits you like a truck.

Modern guitar distortion instead is all about control. This is obtained from amps which through the years had more and more gain stages and which relied less and less on the power amp to distort, until we arrived to amps with large tube power amps (e.g. 120w), with 6L6 power tubes which have a lot of headroom, and all this is to make the power amp sound clean and the amp to rely mostly on the preamplifier for its gain.
This different setup has 2 objectives: 1) to stress less the power amp, thus prolonging the life of the tubes 2) to have a cleaner, tighter low end.

To make the distorted sound even tighter, guitarists like to take a hi-gain head (for example a Mesa Boogie or a Peavey 5150), use the distorted channel and boost it with an overdrive, because it makes the input signal even hotter and the result is a tone with a fast attack, reduced low-mids and a tighter low-end (meaning that when playing a fast, palm muted riff the recoil of the lows is faster and less prominent, so you can hear the riff more clearly).

This solution is particularly good with low tunings (to be honest today it's very hard to even find a band that plays contemporary hard rock-heavy metal in E), because it adds clarity, so in conclusion the modern distortion is about a tight, controlled low-end (which needs to sound clean, because if it's too distorted the riff will sound like a mess, to the point that some metal amp has a separate gain knob for the lows and one for the highs) and a screaming, very defined upper mid range, with a clear attack and good string separation, if you want to play some articulate djenty riff like those of Periphery.

Clearly I have provided the example of 2 very different type of tones and there are surely a million tones in between the old school and the modern one, but I felt like explaining this difference, because it can help defining more the type of sound we have in mind.

Which one among the 2 do you prefer?


Become fan of this blog on Facebook! Share it and contact us to collaborate!!

sabato 15 maggio 2021

How to create manually the glitch effect on guitars, vocals etc...


Hello and welcome to this week's article!

Today we're going to talk about a mixing topic which can be applied to any type of wave source and that, if used with parsimony, can become a powerful arrangement tool to make the track more interesting.
The "glitch" effect simulates a digital artifact of any kind (usualy the fast repetition in loop of a small soundbyte), and it's used widely in rock, pop, metal, hip hop and electronic music (for example it can be heard in the song Sex, Death and Money by Alice Cooper) as icing on the top of a cake which must already be good, to make it even better.

In order to make a glitch effect of repetition, which is the most common, you need to start with quantization, so take a small slice of the guitar track (or both if we're applying it to the rhythm ones), set the quantization to 32nds and just repeat the slice for i.e. a couple of measures (16 times, for example) and push play.

The sound will be the typical one of the reading error of a cd player, and this is just the basic version of this effect.
Now we can get creative: try to quantize slices twice as long to 16th of note (instead of 32nd) to see if they sound better, or create a rhytmical pattern, for example a 3 slice repetitions, 1 empty slice, other 3 repetitions and so on, and in this the limit is really just the imagination.

So far we have mentioned only taking one slice and repeating it, but if we have for example a riff of 4 chords, we can also simply REMOVE one or more slices, rhytmically, from the track, to create a "stutter effect", or use repetitively the same single slice per chord, or we can even change the quantization from one measure to another and move from 16ths of note to 32nds, to add even more movement.

Finally, it's time to talk about automations: with these, you can take your glitched section and automate on it one or more effects in order to give it even more character.
You can apply on it obviously any kind of effect, but our suggestion is to try one of these 2 (or both):

- a pitch shift, or tempo shift effect, that makes the pitch go down fast during for example the final part of the glitch.

- a bit crusher that goes from 0 to 100 during the glitch, to make it sound like it's deteriorating during the repetitions.

Let us know if you use other cool glitch effects!


Become fan of this blog on Facebook! Share it and contact us to collaborate!!

sabato 17 aprile 2021

How to remove fizziness from distorted guitars using a multiband compressor


Hello and welcome to this week's article!

Today we're going to tackle a problem that is typical of distorted guitars, but that can be applied to anything distorted, from a bass to a synth: the excessive high-end fizz, which often can be very bothering, especially if we're using an amp simulator with a lot of gain.

The problem with fizz, that buzzing, harsh part of the sound that hides between the presence area (2k to 8k) and the high end (10k to 12k) is the fact that it's quite hard to pinpoint exactly by doing frequency hunting, because we can can take down some notch here and there, but the fizz can remain pervasively a bit everywhere, and if we take down the whole area the tone loses presence and bite, disappearing in the mix.

How do we solve? The ideal is to change tone until we find one that gets us 80% there, so that we are happy also without doing acrobacies, but this is a privilege that not all mix engineers can have, and sometimes we're forced to work with guitar tracks which are already processed, and sounds super fizzy.

First the highest part of the fizz we can roll it off with a low pass filter set to 10-12k to taste, until we get rid only of the useless part, but then when we arrive to the part from 2k to 8/10k we need to adopt a different strategy, or we'll murder the good part of our tone trying to clean it.

Then when it's time to find the fizz in the presence area, we need to take a Multiband compressor and create just a band between 2k and 3k, just to start, and in this it would be VERY useful if we had a solo function to hear only the affected part, then we start move this band left and right listening to the band in solo until we find exactly the part in which there is the "bulk" of the harshness.

Once the area is perfectly set, we need to set the comp with a fast attack and fast release, and then just take down the threshold until we hear some gain reduction in that area; now we need to hear it in context, so listen to the tone (not just to the compressed band) and raise or lower the threshold according to how much fizziness you want to remove. 

Finally, if we have a lot of palm mutes we can also create a band between 65hz and 250hz to tame the low end recoil (thus freeing up headroom), so that we'll clean up the guitar even more with just one plugin.


Become fan of this blog on Facebook! Share it and contact us to collaborate!!

sabato 6 marzo 2021

What is a sustainer? (with free VST plugins)


Hello and welcome to this week's article!

Today we're going to talk about a type of guitar effect which is often overlooked, but that in some genre can make the difference: the Sustainer!

Let's start with the basics: the sustain is one of the four parts of a sound (click here for a dedicated article), meaning for example with the guitar, how long it passes between when you pluck a string and when the volume goes back to zero.

If we're playing the clean channel of an amp, the cleaner it is the shorter in theory the sustain is, while at the opposite, adding gain adds also compression, which keeps audible also the quieter parts for longer, with the result that the tone has more sustain.

Sustain can be added either by adding gain, distortion, tube saturation or directly by using a compressor, and the original, beloved sustain was actually a product of the signal overdriving the guitar amp tubes, which were not (voluntarily) distorting the tone, but producing a saturated clean channel which provided sustain, and made playing solos more easy.
By adding stages of gain and distortions, reverbs and delays, the guitarits have found many ways to add sustain, but all those methods change dramatically the tone, and sometimes this is not what the guitarist needs:

Sometimes what a guitarist need is a tone that is clean or just slightly distorted, but with an incredibly long sustain, so that all the nuances of the solo are audible and the beauty of the guitar tone can arrive to the listener without being completely disfigured by the other effects, as you can hear for example in the solos by David Gilmour of Pink Floyd

This is where compressors comes into play: a compressor, if set in a way in which it boost the lower part of the signal without affecting too much the rest of the tone, can offer an alternative to the high volume tube compression of a saturated amp, and this has been the success of stompboxes such as the Boss Compressor/Sustainer.

Today in studio there is not even anymore the need of using a hardware sustainer, it is sufficient to have a VST one, and usually the guitar amp suites have some sort of compressor/sustainer bundled, but if you don't happen to have one, you can try one of these 2:


7amp Peak Sustainer - a free sustainer plugin

Hornet HCS1 (demo) - a paid compressor/sustainer


sabato 20 febbraio 2021

Clean guitar tone from a distorted one (and why you should use it)


Hello and welcome to this week's article!

Today we dive back into the guitar world talking about tone, and specifically about a trick that has been kept secret for quite some time: the perks of getting a good clean tone by rolling off the input level that enters a distorted channel.

Usually when dialing in a clean tone we start from the clean channel of an amp, whether it is a real one or a plugin, and we work our way around from there, but there is an alternative way that in some case can sound even better: in some amp, in facts, the clean channel can sound a bit too weak, too cristalline, too "cold", while sometimes the type of clean we are looking for is richer in harmonics, at the limit of the breakup (the point in which it starts saturating and entering almost in the overdrive territory); we can be looking for a tone that is more full in the lower-mid range, and not always this is obtainable from the clean channel.

So what do we need to do? Do we lower the volume?

No. That one can stay fairly high, for example at noon: what we need to do is to lower the input level (if we're using a plugin) or lower the guitar volume by moving the volume knob in the guitar, and this way the signal coming into the amplifier will be weaker (but make sure to turn off any noise gate, or else it will fall below threshold and be cut).

Once the guitar signal will be lowered, the amp will not have anymore enough signal to produce a distorted output, and will give you a very warm tone, much fuller and warmer, and almost "out of focus" compared to the "zing" of the clean channel, in which you can really hear the brightness of the string. 
Now it's time to adjust the master volume in order to compensate for the lower input volume, and this (especially if we're talking about tube amps) will add an additional layer of saturation and harmonic richness, so dose it carefully.

Finally, note that this method of obtaining a low gain/clean tone will need eq adjustments in order to restore some brightness, and maybe to tame some low mids, which will become quite prominent.  


Become fan of this blog on Facebook! Share it and contact us to collaborate!!

sabato 3 ottobre 2020

NaLex Ampex review (free VST plugin with video sample)


Hello and welcome to this week's article!

Today we're going to review a new free guitar and bass amp simulator which is produced by NaLex and which incorporates the models of their other single VST plugins in one: the Amplex!

This plugin is defined by the producer as "guitar tube multiamp", and it recreates a head composed by a preamp section, with gain and eq, and a power amp section, with "power amp" (which is the power amp level control, and even if increased mantains the output volume constant), presence and resonance.

Besides these basic controls the particularity of this plugin is the fact that it can load presets (and comes with many presets bundled), each one of which corresponds to a particular guitar amp (for example the rhythm channel of a 5150, the clean channel of a Fender Twin, or the overdrive channel of an Ampeg bass amp).

Here is the list of the amps simulated, and for each one of them there are usually two or more presets, each one recreating a channel (for example clean and overdrive):


2120 is Peavey 5150 style
Barbarian is Engl Savage style
Bass is Ampeg SVT style
Citrus CR120 is Orange OR120 style
Crunchman is Friedman BE-100 style
Firecube is Engl Fireball style
Four is Diezel VH4 style
Gerbert III is Diezel Herbert CH-3 style
Hell is Randall Satan style
Hot Dog is BadCat Hot Cat style
J800 is Marshall JCM800 style
J800 Lead is Marshall JCM800 Lead Series style
Ketchup is Tomato style
Magic is Crate BV style
Pectifier is Mesa Rectifier style
Revolt is Krank Revolution style
SV is Carvin Legacy style
Twin Clean is Fender Twin style
Uber is Bogner Ubershall style
ZLO is Soldano SLO style


I'm really surprised of how good this amp sim sounds, especially considering that it's free: it is versatile, sounds very realistic, honestly I don't see differences with most of the paid amp simulators on the market (obvioustly excluding the 2 or 3 cutting edge high end ones) and also stable, even if it's not the lightest on the cpu, when loaded on a stereo buss.

I suggest all of you to check it out, it might just be what you were looking for, especially for rock and metal, but there are enough models here to get good tones also for any other genre.


Thumbs up!


Specs taken from the website:


- Controls:

- Gain - input level knob

- Bass - tone knob

- Middle - tone knob

- Treble - tone knob

- Power Amp - power amp level knob (level stabilized input/output)

- Low End - tone knob (resonance)

- Presence - tone knob

- Volume - output level knob

domenica 27 settembre 2020

How guitar amp, stompbox and cabinet simulators affect the harmonics of a tone


Hello everyone and welcome to this week's article!
As you can see we are doing some experiment, to see whether it makes sense to move the blog in this new domain, because it's time to update some things; 
more news will follow, for the time being please be patient because we will have to manually update all the links and it will take some time, anyway you can still refer to the old blog Here.

Today's topic has been suggested me by my friend Carlo from Ignite Amps, and it involves using a spectrum analysis tool to see the changes that occur in our tone with the various types of plugin that can be used in our guitar chain.

The first picture, the one on top, is a sine wave generated from Presonus Studio One, the most neutral sound I could come up with, and in this second image we can see what happens if we pass it through an overdrive (the Ignite Tyrant Screamer, the settings of all the plugins are at noon): you can see the solid state style distortion produced, which creates harmonics in a regular, repetitive way.


In this third picture we see our sine wave passing through a tube power amp simulator (the Ignite TPA-1), notice that the harmonic increase is not as dramatic as per the overdrive, but this addition makes the tone warmer and fuller thanks to the tube emulation.


In the fourth picture, the one below, you can see what happens if we pass our sine wave through a preamp, the Ignite NRR-1; here we can see a more noticeable change, especially in the high end.


In this fourth picture you can see the result of summing up the overdrive, the preamp and the power amp: the harmonics add up, and if you look closely for example you can see graphically the overdrive ones and the preamp ones.


Finally one of the most important steps, which once again changes dramatically the tone: the cabinet simulator (in this case Lancaster Audio Pulse, using its stock IR):  the change is significant, because the IR applies its own EQ curve, in this case lowering the high end and gives the tone its final touch in order to sound realistic.


Obviously I have used a sine wave because it's easier to show graphically, if you will repeat this experiment using your guitar tone it will look different, but I have made this article to focus on two things: the importance of a power amp, compared to when someone puts a virtual preamp directly into a cabinet simulator, and to show how drastic are the changes performed by the cabinet simulator.

I hope this helps!

sabato 18 luglio 2020

Free VST guitar amp sims article updated with 23 new plugins!


Hello and welcome to this week's article!

Today I have reviewed and updated one of our most popular articles: the one about free amp simulators, adding 23 new free Vst amps (all of which sound very good).

You can check out the updated article here!

Let us know what you think about it and whether are there more good free Guitar Amp VSTs we haven't mentioned yet!

sabato 4 luglio 2020

Everything you need to know about effects part 4/4: Distortions!


CLICK HERE FOR PART 1/4: Fx routing, in studio and live!

CLICK HERE FOR PART 2/4: Reverb and Modulations 1

CLICK HERE FOR PART 3/4: Reverb and Modulations 2


Once we have gone through all the most common application of modulation effects, it's time to pass to what is considerable the most important type of effect that we can apply to a tone, an effect which has taken an instrument, the electric guitar, and made it the most important, influential and beloved one of the 20th century: the distortion, in all of its forms.

The overdriven guitar tone is born by mistake: bands were using tube amps in the '50s and '60s, and back then there wasn't even a real PA to amplify them, so guitarists, especially those that were playing in big arenas, had to crank them at the maximum volume.
The signal passing through the tube circuits ended up saturating them, and the result was a distorted tone, with lots of additional harmonics and some compression that the guitarists found out to be exciting, to make the tone edgier and even easier to play: the tube overdrive sound was born.
The audio enhancement provided by tubes is still today often used in studios, to add a track, especially if digital, the liveliness typical of the vintage hardware.

Not too long after the discovery of the tube overdriven sound, guitarists (especially the pioneer Jimi Hendrix) started to ask themselves "where do we go from here? How can I make my tone ever more extreme?", and producers started working tirelessly to replicate the distorted sound of a tube amp full volume in a stompbox, and came up with an infinity of solutions, which can be divided in 3 macro groups: fuzz, overdrive and distortion.

The first models to hit the market (end of the '50s/early '60s) was the fuzz: it is a type of pedal that takes the original sound and distorts it, but in a very unique and specific way, by taking the sinusoidal wave and turning it into a squared one.
The result is a gritty tone with lots of sustain, impossible to obtain with a regular amp, and it was the staple of riffs that made the history of rock, such as Rolling Stones' (I can't get no) Satisfaction and most of the Jimi Hendrix and Pink Floyd solos, just to name a few.

An overdrive is a pedal that recreates (sometimes also by using a tube) the saturation of a tube amp full volume without the need of pushing it (thus without ruining the tubes): the effect is a slight distortion, more attack, less low mids, lots of extra harmonics and some extra compression; this is a great pedal to boost our amp and even out its frequencies, and it's often a solution used when recording.

Another effect that can be considered a more extreme evolution of the overdrive is the distortion.
The distortion is a pedal aimed not to boost an overdrive channel of an amplifier but to replace it, going directly into the clean one, since it's capable of producing high levels of gain, or bypassing the preamp altogether and going direcly into the power amp.
Distortions have seen their moment of maximum popularity in the '80s, with many guitar heroes (such as Steve Vai) and classic heavy metal bands (like Judas Priest) using them regularly, and still today they are very popular in certain genres such as grunge or alternative rock.

Finally, a sound can be further degraded or modified creatively in an infinite amount of other ways, and there are today pedals to do practically everything, but there are still a couple of effects that are worth to be mentioned here: the harmonic exciters, which takes certain harmonics of our tone and emphasizes them, which is a cool way for example to add brightness to a sound without messing too much with the eq (click here for an article about harmonic exciters with free VST plugins) and the bit crusher, which on the other hand takes a sound (usually vocals, or drums, or a bass) and degrades it by reducing the bit depth, creating the feeling that the sound comes through some vintage gear.

sabato 5 ottobre 2019

5 ways to improve an amp sim guitar tone


Hello and welcome to this week's article!
Today we're starting a new serie called "How to improve", in which we will add some element to our basic mixing articles.
This time we're talking about 5 ways to improve our amp sim guitar tone, which even if we are using some high end plugin, still needs some polish before it can perfectly sit in the mix.
These tips are to be applied after recording, editing, finding the right guitar amp sim and tweaking it.

1) Impulse responses: impulse responses are the single most revolutionary thing happened to the world of guitar tones in decades, since they can change radically a sound and make it realistic in a way that few years ago was unthinkable without microphoning a real amp.
Get yourself a nice collection of impulses, at least a couple of hundreds, it doesn't matter whether free or paid, just make sure to have enough variety to cycle through them until you find the one (or the combination of more than one) that fits perfectly the song, and in order to do it, use a referencing track with a sound similar to what you have in mind.
A good starting point would be our free IR Pack Trident, which has 14 impulses ready to use.

2) Create a guitar bus: route all the guitar tracks that should have similar tones (e.g. the rhythm guitar tracks) into a stereo guitar bus, in order to control with one fader the general presence of guitars in the song.

3) Compress the minimum necessary: the general rule here is "the more the gain = the more the natural compression", so if we have clean guitars we will need to compress more, while if we have high gain ones, we're going just to use a multiband compressor in the low end area, shaving off a couple of db when needed in the area from 80 to 350hz (usually during palm muting).

4) Equalize with wisdom: here the general rule is "boost wide, cut narrow". We could spend hours talking about how to clean a guitar tone, but in this article let's just add the fact that we need to find balance: the sound must be natural, similar as if it's coming out of a real amp, so:
- high pass up to 50 to 80hz
- if the guitar still sounds weak and lacks of presence, add some body in the area between 1000 and 2000hz, finding where it suits, with a wide bell boost of 1 or 2 db.
- cut a couple of db with a narrow bell in the 4k area, sweeping the eq until you find the "nails on a fingerboard area"
- add some air, with a wide bell around 8-10khz

5) Don't be afraid of saturation: this is another tool to be used if our tone (especially if clean or overdriven) is too weak, thin, and we can't solve by using the eq; a touch of tape or tube saturation can add the weight and the midrange our tone needs without altering too much the sound.
This tool can be used on other instruments too!


I hope this was helpful!


Become fan of this blog on Facebook! Share it and contact us to collaborate!! 

sabato 10 agosto 2019

How to adjust the action of a guitar or bass (a guide for dummies)

Hello and welcome to this week's article!

Today we are going to see how to adjust the action of a guitar or bass, and this is to be considered the "prequel" of our article about how to set the intonation of our instrument.
Small disclaimer: this is more an article to explain how things work, if you want to have a professional work go to a luthier and have him set up the guitar for you, while if you're a DIY lover, proceed at your own risk :D

First off the definition: the action is the space between the top of the 12th fret of our guitar and our strings, and it determinates the comfort and the speed of our playing: a higher action will allow us to be more precise and with a cleaner sound, but a lower action will allow us to go faster with less effort, so the right distance varies according to our taste and there isn't a height that fits perfectly for everyone (even if Gibson suggests, for its guitars, a minimum string height at the first fret of 1.22mm for the high E and 1,98mm for the low one)
.
Beware that if the action is too low we will have fret buzz or mute frets, meaning that in some part of the keyboard the string gets muted (the so called "dead note"): in this case we'll have to raise slightly the string height or adjust the truss rod.

The normal position of the neck is either absolutely straight or with a very, very slight bow ("u" shape), in an almost imperceptible way; if the neck is too bent backwards (the so called "n" shape) or forward (the so called "u" shape) we will need to adjust the truss rod (which is a metal rod that lies inside the neck and counterbalances the string tension) with a hex key:


If the neck is bent "n" shaped, the frets will buzz in the certral part of the fretboard, meaning around the 5th to 12th fret, while if the neck is bent "u" shaped, it will buzz in the lowest and highest frets.

In both cases we can solve by finding the screw of the truss rod, which is usually located in the headstock, and sometimes it is covered with a lid, and turning the screw with the hex key.


By turning the truss rod screw COUNTERCLOCKWISE you will add relief, meaning that the neck will make less resistance to the tension of the strings and it will become more "u" shaped, while by turning it CLOCKWISE you will reduce relief, meaning that the neck will make more resistance and will become more "n" shaped.
By adjusting the neck curve what we are looking for is the sweet spot in which there is no fret buzz nor dead notes when playing every string in every fret of the fretboard: when this happens, it means our instrument neck is straight.

Once the neck is straight it's time to adjust the string height of our action: we need to turn the screws at the sides of the bridge (in case of tune o'matic bridge) to raise or lower the string height until we find the perfect action that is not too uncomfortable to play and that lets every note ring perfectly.
There are also bridges (like the Fender ones) that lets us regulate the height of each single string by raising or lowering the individual saddles.


Once our guitar is straight and the string height it's perfect it's time to work on the string intonation (click here for a dedicated article)!


Become fan of this blog on Facebook! Share it and contact us to collaborate!!

sabato 13 luglio 2019

Presence and resonance controls in a guitar amplifier


Hello everyone and welcome to this week's article!
Today's article is a small analysis of what are those two additional controls that sometimes are featured on guitar amplifiers, and that sometimes have a different meaning from brand to brand.

Presence and resonance controls are less intuitive than other knobs (Eq, Gain, Reverb...), but are quite important as tone shaping tools, because when they are available, they let us modify dramatically our tone, adding a lot of versatility to the amp.

Let's start by clarifying that the aforementioned controls Gain and Equalization are the tone shaping controls of the preamp, and usually the eq is subtractive, meaning that it filters out frequences in that range unless you put it to max (but not in all amps), while Presence and Resonance affects the power amp section, so their shaping takes place after the preamp stage.


- Presence is an UPPER MID BOOST, which means that it adds upper mids to the sound coming out from the preamp, and its use must be somehow counterbalanced with the treble knob of the preamp: if they are both too high their effect is summed, and the distorted channel ends up sounding like nails on a blackboard.
It adds attack to the sound, aggressivity, but it takes away some body on the mid range area, and progressively takes our hi gain tone towards a "Pantera"-like type of sound.
The ideal position is from twelve o'clock to 3 o'clock, according to how much aggressivity we are looking for, but if the amp sounds very dark we can push it more, maybe being a bit conservative with the treble control.

- Resonance, on the other hand, works for the low end in the same way Presence works in the high end: it boosts the bass frequences, and usually we're not talking about the lower mids, but really just the lower ones, the "oomph" you get from the palm muting.
Dial in too much and the sound will become uncontrollable, especially when recording, but live if our guitar tone is too weak we can move it a bit higher than unity to have that cool rebound that is needed when muting the strings. On a general level, though, it's not suggested to push it more than 12 o'clock.


Hope this was helpful!


Become fan of this blog on Facebook! Share it and contact us to collaborate!!

sabato 22 giugno 2019

TRIDENT IR PACK: FREE impulse response suite exclusive for Guitar Nerding Blog!


Hello and welcome to this week's article!

Today we are talking about the result of our IR creation experiments, lasted for months, done my me and my friend Dano (Thank you man!) in our rehearsals room, from which I have written my How to capture an Impulse Response from an amp article (click here to read it!).

The result is a custom Ir pack that I have called Trident IR Pack, and it's a pack consisting of 14 48khz impulses created using the power amp section of a Marshall JVM Vintage Modern head, into two cabs, a Marshall 1960 4x12 and an Orange 2x12.

The impulses were captured by two microphones, a Shure Sm57 and a Sennheiser e609, two industry standards, through Presonus Xmax preamps.

There are serveral impulses, taken from the microphones in various positions, and each one has a naming code, which must be interpreted this way:

gnb = Guitar Nerding Blog
mar jvm = Marshall JVM Head
mar412 = Marshall 4x12 cab
org212 = Orange 2x12 cab
57 = Shure sm57
e609 = Sennheiser e609
45deg = the microphone was at 45 degrees, pointing towards the center of the speaker
center = the microphone was pointing straight to the center of the speaker
dustcap = the microphone was pointing to the sweet spot between the dustcap and the cone
edge = the microphone was pointing to the edge of the cone

For best results I suggest you to blend 2 impulses with a cab loader such as Ignite Amps NadIR.

Let us hear your creations using this pack and help us spreading the word!

Enjoy!


CLICK HERE TO DOWNLOAD TRIDENT IR PACK! 


sabato 6 aprile 2019

How to record a song part 4/6: guitars!


Now that we have some solid drum track and a nice bass line it's time to tackle one of the elements that in many genres is considered one of the most important elements of our mix: the guitar.

The guitar recording phase has many points in common with the bass one: before recording we need to take care of our instrument by making sure it's in the best status possible;
we need to clean the fretboard if it's dirty and sticky, change the strings and set the correct intonation for the tuning, tune it perfectly (and re-tune it every few takes) and check whether the pickups are at the perfect height.

Once we have chosen the right pick and have written down clearly the order of our effects it's finally time to lay down our action plan:

- Are we recording an acoustic guitar? Click here for a dedicated article.

- Are we writing a Midi track with a virtual guitar? Click here for a dedicated article.

- Are we recording an electric guitar? Here the choices are the following:

1) by recording the D.I. track directly into the audio interface: this way we will be able to choose our sound afterwards, by using a Vst guitar amp simulator (click here for a dedicated article) or by reamping our track in a real amp.

2) by using an hardware preamp with speaker simulation (like a Pod) directly in the audio interface.

3) by microphoning an amp (click here for a dedicated article). Microphoning an amp is an art that takes long time (and a lot of trial and error) to be mastered, and there are many factors to be kept in consideration: how the mic position affects the transient, the fact that we can use multiple microphones to blend the resulting tone together, and the fact that the interaction between those microphones can generate phase issues.
Finally, when microphoning an amp, is very important to consider the cabinet we are using, and inside the cabinet, the speaker.


How many guitar layers should we record?
It depends on the genre: sometimes one track is enough when the guitar is just a background element (for example in some pop song), usually in rock there are two tracks that gets panned left and right, but there are also genres in which a thicker wall of sound is required, so we can also abund and quad track our guitars.


CLICK HERE FOR PART 1/6: PREPARATION!

CLICK HERE FOR PART 2/6: DRUMS!

CLICK HERE FOR PART 3/6: BASS!

CLICK HERE FOR PART 5/6: VOCALS!

CLICK HERE FOR PART 6/6: KEYBOARDS AND EXTRA ARRANGEMENTS!


Become fan of this blog on Facebook! Share it and contact us to collaborate!!

sabato 19 gennaio 2019

How to mix a song with free plugins part 3/5: Guitars!


Hello and welcome to this week's article!
Now that we have laid down our rhythm section, it's time to work on one of the most versatile instruments of a mix: the guitar.
A guitar can play almost every role in a song, according to the genre: it can do just some lick here and there as arrangement, it can be like in metal a pillar of the rhythmic section, it can substitute the vocals in a solo part.
As you can see, there is a lot to say and a lot to do.

Let's start by saying that a guitar track can be acquired by microphoning an amp or by going straight into a d.i. box and then reamping the sound, it can be acoustic, electric clean, distorted, and all the shades in between.
The guitar sound can even be virtual: there are virtual instruments that recreate the tone of a guitar, and that you can mix like real guitars (although they obviously will never have the realism of a real one).
About reamping with guitar amp simulators, here are the best free ones, and here is a comparison article with samples of the most populars among them.

- Do we need a strong rhythmic sound? Then we need to record two guitar tracks and pan them one left and one right (around 80% left and right should be fine to give a good sense of width, click here for an article about panning);
we might even consider quad tracking our guitars if we are confident that we would be able to record precise enough.


Click here for an article about how to mix rock/metal guitars.

Click here for an article about how to mix guitar solos.


After mixing our guitar tone we need to put it in the context of the mix, to make it sit perfectly among the other instruments, and sometimes we don't want to change too much the eq of our guitar sound: here's a way to make our guitar tone move more towards the midrange without changing the eq.

And finally, here's our omnicomprehensive article about effects and distortions with free VST plugins!


CLICK HERE FOR PART 1: DRUMS!

CLICK HERE FOR PART 2: BASS!

CLICK HERE FOR PART 4: VOCALS!

CLICK HERE FOR PART 5: KEYBOARDS AND EXTRA ARRANGEMENTS!


Become fan of this blog on Facebook! Share it and contact us to collaborate!!

sabato 17 novembre 2018

How to clean up a distorted guitar and bass sound using eq


Hello everyone and welcome to this week's article!
The article of today is a focus on guitar and bass hi gain sound, so it should be used as addition to our article How to mix a rock/metal guitar and How to mix a rock/metal bass.

This article will only talk about the distorted, hi-gain guitar and the hi-gain part of a bass track (if you are using a dual or more tracks technique), and starts from the assumption that a distorted track has by nature a good part of noise and resonances, and we need, from that noise, to minimize the bad part and emphasize the useful one.

How do we tell the good part from the bad part?
By nature a distorted track adds a big amount of gain and saturation in all frequencies, therefore along with an important increase of level for what is the original sound of our instrument we end up with a lot of "dirt", which eventually might end up by covering the other instruments, or producing unwanted peaks that prevents us from rising the overall volume.

By finding and notching out those peaks and resonances we will free a considerable amount of headroom (very hard to point out at first listen, unless you have a trained ear) that will let us raise the volume of the track, making it more present and at the same time it will sit better in the mix. Sometimes, in facts, we might feel our guitars weak, low in volume, not very present, but if we rise the volume we will have it reaching the maximum level and clipping while it still sounds weak and low; that's because some frequency that we might even not notice at first is so high in volume that hits the ceiling before all the rest, thus keeping all the rest of the curve low.

How do we find these resonances to notch out?
The nature and the modern technology comes in our aid, with our ear (here's an ear training tutorial) and with frequency analyzers (here's a dedicated article).
Obviously frequency analyzers are importants because we can see right away if there are resonances and take them down some db until they are aligned with the rest of the curve, but the thing that makes the difference between a regular mix engineer and a good one is by using the ear to clean up the track.

It's very simple to do once you know how to do it: you create with an eq a narrow notch and boost it considerably, around 6/10db, then you start sweeping left and right through your distorted guitar and bass sound.
You will hear every kind of weirdness but what we are looking here are the frequency areas that does not resonate with the note that the instrument is playing in that moment (for example in a guitar riff with a sequence of notes), leave the parts in which you can hear strongly the note played and focus on the parts in which there is a noise, a weird sound, that remains the same regardless from the note played.
Those are the frequencies we are looking for, and once we isolate them, we must take them down 2 to 4db, until they are not so prominent anymore.

Think about those frequencies as junk to remove: what we are aiming here is to notch out 2 or 3 of these areas, quite surgically, in order to make room to the part of the sound that will be actually audible in the mix: the ones that comes with the note; the others are useless and eat up only headroom.
I'm not writing specific frequencies here because they vary according to an infinity of factors: guitar, pickups, string gauge, amplifier, and most importantly, the tuning.

I hope this was helpful!


Become fan of this blog on Facebook! Share it and contact us to collaborate!!

sabato 6 ottobre 2018

Top 10 Free Vst Plugins 2018


Hello and welcome to this week's article!
Today we are talking about 10 FREE Vst plugin that we suggest you to try, they can be a good start for a small low budget home recording project, and they can provide you a wide array of tools to get in the recording world at zero cost.

It's important to point out that not all of them came out in 2018, but this is a basic package we suggest to download if you are new with recordings and want to try some nice free plugin.


1) Ignite Amps ProF.E.T.: I have put this plugin in the first position because it's today's new (04/10/2018) that this plugin has won the KVR Developer Challenge 2018 (congratulations!). It is a great guitar preamp simulator, good for a wide array of sounds but focused on rock/metal, and obviously it needs a speaker simulator to run.

2) Izotope Neutrino: this is a sort of swiss army knife; it's a multiband compressor hidden in a super minimalist interface, in which you are allowed basically only to choose the instrument (between vocals, drums, bass and guitar/generic instrument) and the amount of the effect. You just slam these plugins in the respective bus of each instrument group and it will analize the spectrum and apply a subtle multiband compression in the areas that are peaking too much or resonating weirdly, and at the end (hopefully) the final track will sound cleaner and more polished.

3) Klanghelm MJUC-jr: anyone that follows this blog from long enough knows how much I love peak limiters; they are the earliest version of compressors, easy to use and good to fatten up any signal, from single instruments to bus compression. This type of plugins are particularly good for parallel compression, or to fatten up acoustic cymbals tracks, bringing out some of the body of the drumset while limiting the peak of the cymbals.

4) Ample Bass P Lite 2: since not always we have a bass or a bass player at hand, this free vst bass sampler can turn out to be a life saver; it recreates the sound of a clean bass that can be controlled via Midi and processed like a normal bass, and it is ideal to streamline the songwriting process, to write down quick rough mixes to share with the bandmates.

5) Mt PowerDrum Kit 2: this is a surprisingly good drum sampler, free to download, which includes several pre processed kits usable for different genres and midi grooves, and it's an amazing starting point for anyone who needs a good drum sampler to record a rock demo.

6) VSCO2 Rompler: this is a good free orchestra vst instrument which can recreate various sections
of an orchestra with a good degree of realism, although obviously the midi track needs to be tweaked accordingly to make it even more realistic and dynamic. The samples are not bad, and it is definitely a good starting point for anyone who wants to try and write an orchestral part.

7) Ignite PTEq-X: in a world of graphic equalizers, PTE eq takes a different route, by recreating a classic hardware parametric eq with a particular workflow (sections can be boosted or cut in a combined way as explained in the review), and it allows us to achieve very natural and realistic results, manipulating the sound in a very musical way.

8) Sean Pandy Drums: this little free drum sampler has a very particular story: it is a simple drum sampler composed of kick, snare, 4 toms and a sub blower (so it should be used in combination with another sampler that includes cymbals) with various velocities etc, but the cool thing is that it consists in samples created by a famous metal producer who released them for free in the past. Now these samples are not available anymore for downloading, but the home producers community kept on sharing and using them, until this guy took them, created 6 velocity layers for each one (not only changing the volume but also the their attack/decay/sustain and envelope) and put them together in this free plugin, so now anyone can use these good samples for free.

9) Softamp GT: this is a vst recreation of the famous Sansamp Gt2 Stompbox, probably the most famous guitar amp simulator that could be used directly into the mixing board before the advent of digital emulation. It features all the original controls (eq, 3 channels, 3 mic placements) and many more new controls, and it just sounds surprisingly good, both for rock and for metal tones, even for the most extreme and scooped ones, thanks to tons of gain and a very fast and definite attack.

10) Audio Damage Rough Rider 2: this is a different type of compressor compared to the aforementioned Klanghelm one, and it is aimed mainly to rhythmic tracks such as drums, bass and electronic beats, because besides adding fatness and punch, it also adds a subtle saturation that makes them even more warm and present.


What about you? Did you know these plugins? Which are your favourite free vst plugins that you use in your projects? Let us know!


Become fan of this blog on Facebook! Share it and contact us to collaborate!!